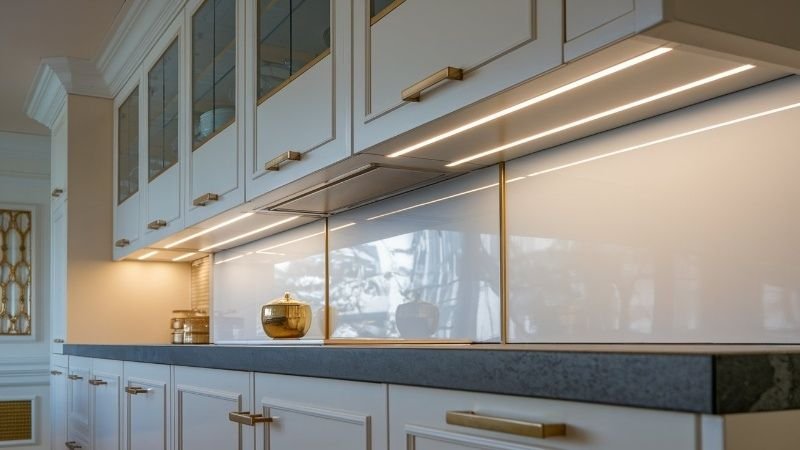
Kitchen Lights Under Cabinet: The Best Picks for Your New York Home
Are you looking for the perfect under-cabinet kitchen lights to brighten up your home in New York? Whether you’re renovating your kitchen or just adding a stylish touch, under-cabinet lighting is an easy way to enhance your kitchen’s look and functionality. In this blog, we’ll review some of the best options for under-cabinet lighting, focusing on style, energy efficiency, and ease of installation. Let’s dive into the details.
Why Choose Under-Cabinet Lighting?
Under-cabinet lighting does more than just illuminate your countertops. Here are a few reasons why they’re a must-have:
1. Enhanced Visibility: Perfect for meal prep and reducing Maintenancecountertop shadows.
2. Energy Efficiency: LED options consume less electricity.
3. Modern Aesthetic: Adds elegance to your kitchen.
4. Space-Saving: Doesn’t take up additional room like table or ceiling lights.
Top Features to Look for in Kitchen Under-Cabinet Lights
Before we dive into product reviews, let’s go over the features that matter most:
1. Brightness: Look for adjustable brightness to set the perfect mood.
2. Color Temperature: Options range from warm white to cool daylight.
3. Ease of Installation: Plug-in or battery-powered lights are simpler to set up.
4. Energy Efficiency: LEDs are long-lasting and save electricity.
5. Design: Sleek and slim designs blend well with modern kitchens.
Also Read 3 in 1 Digital Laser vs. Land Long 165FT Tape: Which Wins?
Top Picks for Under-Cabinet Kitchen Lights
1. Brilliant Evolution Wireless LED Puck Lights
Why It’s Great:
1. Battery-powered, no wiring required.
2. Touch-sensitive and remote-controlled.
3. Adjustable brightness for customized lighting.
Best For: Renters or homeowners seeking an easy, no-drill solution.
Pros:
1. Affordable and easy to install.
2. Energy-efficient LED bulbs.
3. Sleek design fits any kitchen.
Cons:
1. Batteries need frequent replacement.
2. Limited to small areas.
Buy on Amazon
2. LEPOTA Under Cabinet Lighting Bar
Why It’s Great:
1. Hardwired for consistent power.
2. Dimmable and color-adjustable.
3. Slim, modern design.
Best For: Permanent kitchen installations where durability matters.
Also Read Bosch 18V Cordless Drill Review: Best Tool for USA Construction Projects?
Pros:
1. Adjustable light temperature.
2. Long-lasting LED with high energy efficiency.
3. Excellent brightness for large counters.
Cons:
1. Requires professional installation.
2. Higher upfront cost.
Buy on Amazon
3. Wobane Under Cabinet LED Lighting Kit
Why It’s Great:
1. DIY-friendly plug-and-play system.
2. Comes with adhesive strips for mounting.
3. Remote control for easy operation.
Best For: Those looking for affordable yet effective lighting.
Pros:
1. Easy to install with adhesive backing.
2. Bright and energy-efficient.
3. Affordable price point.
Cons:
1. Adhesive may weaken over time.
2. Limited customization.
Buy on Amazon
Comparison Table
| Product Name | Power Source | Brightness | Color Options | Ease of Installation | Price Range |
| Brilliant Evolution Puck | Battery | Adjustable | Warm White | Very Easy | $24.99 |
| LEPOTA Lighting Bar | Hardwired | High | Adjustable Colors | Moderate | $35.99 |
| Wobane Lighting Kit | Plug-in | Bright | Neutral White | Easy | $20.99 |
Real-Life: Under-Cabinet Lights in New York Kitchens
Here are some real-life examples that show how under-cabinet lights transformed kitchens:
1. Small Apartment Kitchen
In a small New York apartment, the owner installed Brilliant Evolution Puck Lights. These lights provide a warm glow over the counters, making meal prep easy and enjoyable. The easy installation allowed the owner to set them up without any professional help, and the kitchen instantly looked modern and brighter.
2. Modern City Home
A modern New York home used LEPOTA Lighting Bars in the kitchen. With their slim and stylish design, these lights added a classy touch to the space. Being hardwired, they provide long-lasting and bright lighting. The homeowners hired an electrician for installation, ensuring a professional finish.
3. DIY-Friendly Kitchen Makeover
A couple transformed their New York kitchen using the Wobane Lighting Kit. These plug-and-play lights came with adhesive strips, making installation super easy. The budget-friendly lights allowed the couple to achieve a stylish kitchen makeover without exceeding their budget.
Pro Tips for Choosing the Right Kitchen Lights
1. Measure First: Know the dimensions of your cabinets to choose the correct size.
2. Check Power Options: Decide between battery, plug-in, or hardwired options based on your setup.
3. Consider Dimming Features: This is great for creating a cozy ambiance during dinner.
4. Look for Smart Features: Some lights are Alexa- or Google-compatible for voice control.
Benefits of Under-Cabinet Lighting in New York Kitchens
New York kitchens are often compact, and lighting plays a key role in making the space feel larger and more inviting. Under-cabinet lights:
1. Maximize space in small kitchens.
2. Add a luxurious touch, perfect for modern city homes.
3. Reduce energy bills with LED options.
How to Install Under-Cabinet Lights
Installing under-cabinet lights can be easy if you follow these simple steps. Let’s see when you can do it yourself (DIY) and when you might need a professional.
DIY vs. Professional Installation
DIY Installation:
You can install the lights yourself if:
1. The lights are plug-in or battery-powered.
2. You have basic tools like a screwdriver and adhesive strips.
3. You are okay with simple, no-wiring setups.
When to Call a Professional:
Hire an electrician if:
1. The lights need to be hardwired to your home’s electrical system.
2. You are not comfortable handling wires or electrical outlets.
3. You want a clean and permanent setup.
Tools You Will Need
Before you start, gather these tools:
1. Drill: To make holes if screws are required.
2. Adhesive Strips: For easy mounting.
3. Wire Connectors: If connecting to an electrical system.
4. Screwdriver: To tighten screws.
5. Measuring Tape: To measure cabinet size.
6. Pencil: To mark where the lights will go.
Step-by-Step Installation Guide
Step 1: Choose the Right Lights
1. Decide if you want battery-powered, plug-in, or hardwired lights.
2. Check the size of your cabinets to make sure the lights will fit.
Step 2: Mark the Placement
1. Use a pencil to mark where you want to place the lights.
2. It’s best to position them near the front edge of the cabinet for better lighting.
Step 3: Prepare the Area
1. Clean the underside of the cabinet to remove dust and grease.
2. Make sure the surface is dry so the lights stick well.
Step 4: Mount the Lights
1. For Adhesive Lights: Peel off the adhesive backing and press the light firmly onto the cabinet.
2. For Screw-Mounted Lights: Drill small holes where you marked, then attach the lights with screws.
Step 5: Connect the Power
1. Plug-in Lights: Plug the light into a nearby outlet.
2. Battery-Powered Lights: Insert the batteries and turn them on.
3. Hardwired Lights: Call a professional to safely connect them to the power supply.
Step 6: Test and Adjust
1. Turn on the lights to check if they work.
2. Adjust the brightness or position if needed.
Final Thoughts
Under-cabinet lighting is a game changer for your kitchen’s functionality and style. Whether you go for wireless puck lights, sleek LED bars, or affordable lighting kits, there’s an option for every home in New York. Upgrade your kitchen today with these top picks and enjoy a brighter, more inviting space.
Frequently Asked Questions (FAQs)
Q: Are under-cabinet lights expensive to run?
A: Not at all, LED lights are highly energy-efficient and cost just a few dollars a year to operate.
Q: Can I install under-cabinet lights myself?
A: Absolutely, Many options, like plug-in or battery-powered lights, are DIY-friendly.
Q: Which type of under-cabinet light is best for small kitchens?
A: Slim LED light bars or puck lights work best in small spaces.
Q: How long do LED under-cabinet lights last?
A: High-quality LEDs can last 10-20 years, depending on usage.

Leave a Reply